Knowledge Center
TOOLS & CHARTS ―
CLICK HERE TO DOWNLOAD PDF
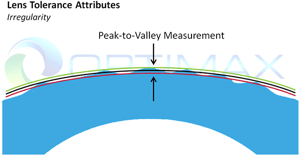
Irregularity: Interferometer Measurement
RELATED TERMS: Form Error, Sphericity, Flatness
UNITS: Linear units, wavelengths or half-wavelengths (fringes)
SPECIFICATIONS MUST CONTAIN: Value (RMS, Peak-to-Valley (P-V) or both) over an aperture
OPTIMAX PREFERRED SPECIFICATION: P-V surface error in fringes at HeNe
REASONS: Contributors may be directly targeted
MANUFACTURING STANDARDS: ISO 10110-5, OEOSC OPI.004
CLICK HERE TO DOWNLOAD PDF
OF THE MANUFACTURING TOLERANCE CHART


Learn from the Experts
Find out more by downloading our technical note on Irregularity
Specifying And Measuring Spherical Surface Irregularity
Define surface irregularity for spherical surfaces, offer information on measurement methods for testing surface irregularities, and some specification guidelines.

